Start by costing one dish.
Start with one recipe and current supplier prices. Allow about fifteen minutes for a first dish; checking missing details can take longer. Follow five stages to its food cost and your first order.
15 days free, then $49/month per kitchen. Card required; $0 today. Cancel before day 16 in Settings → Billing, no call required. What to prepare · Plan and team limits
This page
3 parts · 5 stages · 1 dish- 1Before you startDone when one invoice and one recipe are within reach.
- 2The five stagesDone when one dish has a plate cost you can check on paper.
- 3After setupDone when the next dish and the first teammate are in.
Part 1 of 3 · Before you start
Have one recipe and its supplier prices ready.
You have done this before. The last tool wanted your whole catalog typed in before it would do anything, and the half-filled spreadsheet is still on the desktop.
CostCook wants what is already written down: one invoice, one recipe. Review the amounts and prices it reads, then fill in any missing details.
Have ready
2 papers · 1 phone- 1One invoice from the supplier you buy the most from.A photo of the paper is fine. So is the PDF they emailed you. A price sheet works the same way.
- 2The recipe for one dish you know well.The card, a photo of the card, a PDF, a link to it, or the text. It does not need to be tidy.
- 3Your phone, or the laptop you are reading this on.Setup works on either. The photo can come straight off the phone.
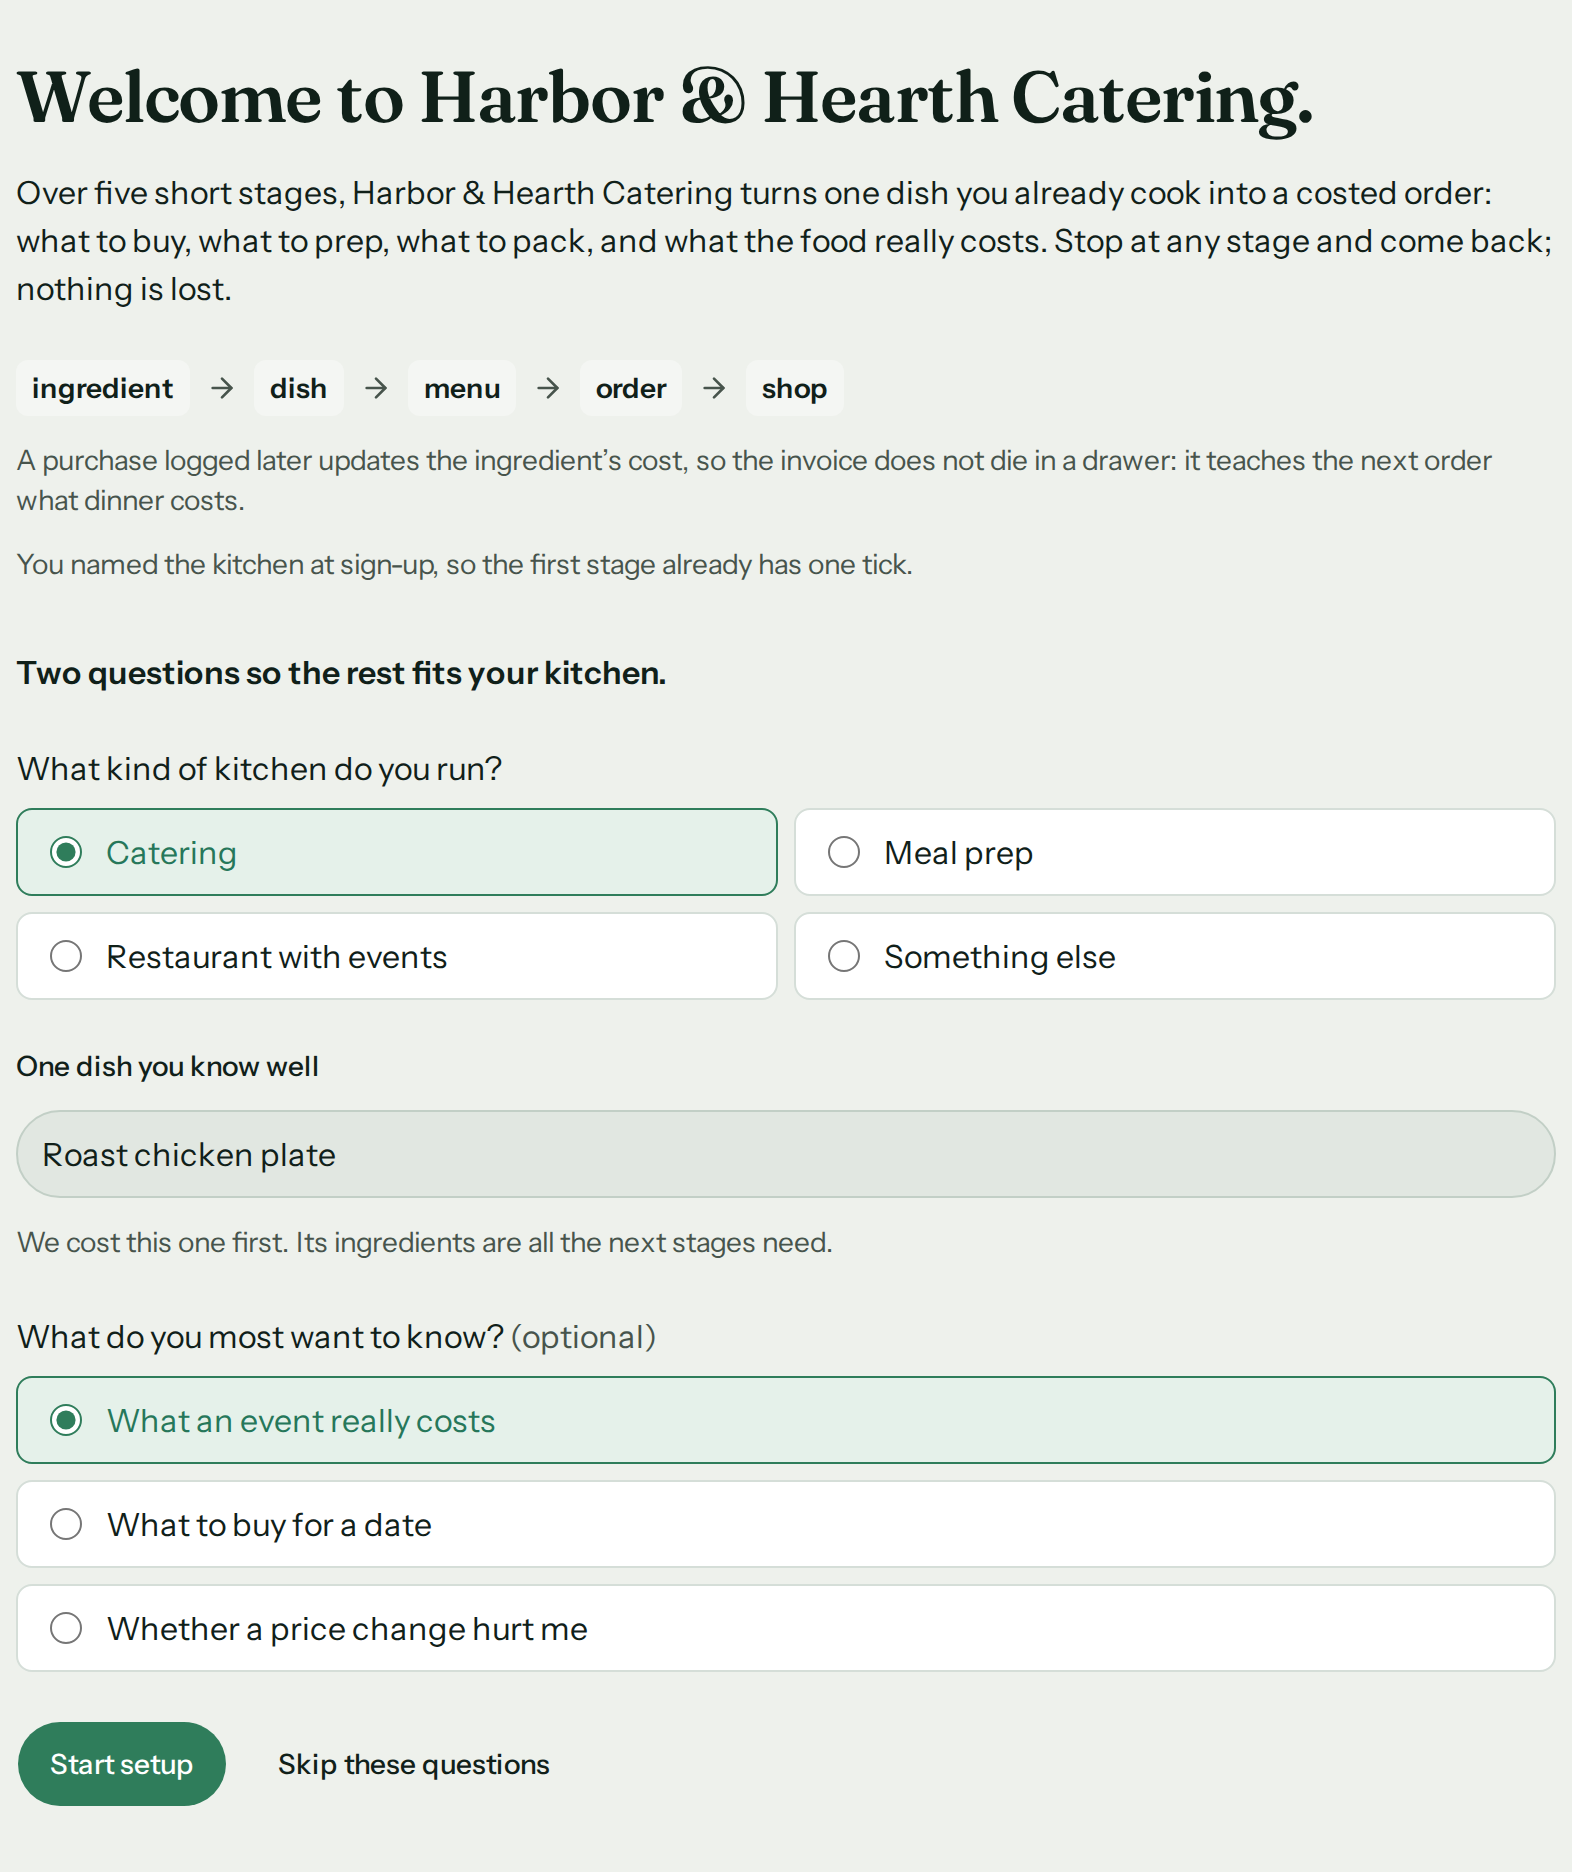
During sign-up, you name your kitchen and enter the card for your trial. Name the dish at the welcome, and every screen after says its name back to you.
Those answers take a minute. These five stages are the work.
Part 2 of 3 · The five stages
Five stages is one dish’s worth of facts, and two of them are uploads.
Each stage asks for the next thing that one dish needs, and nothing else. Here is each one as you will meet it.
Kitchen and suppliers
Name the supplier you buy the most from, set the share of a selling price food should take, and tap “Save and continue”; the invoice adds the rest of the supplier’s details.
Done when Add one supplier.
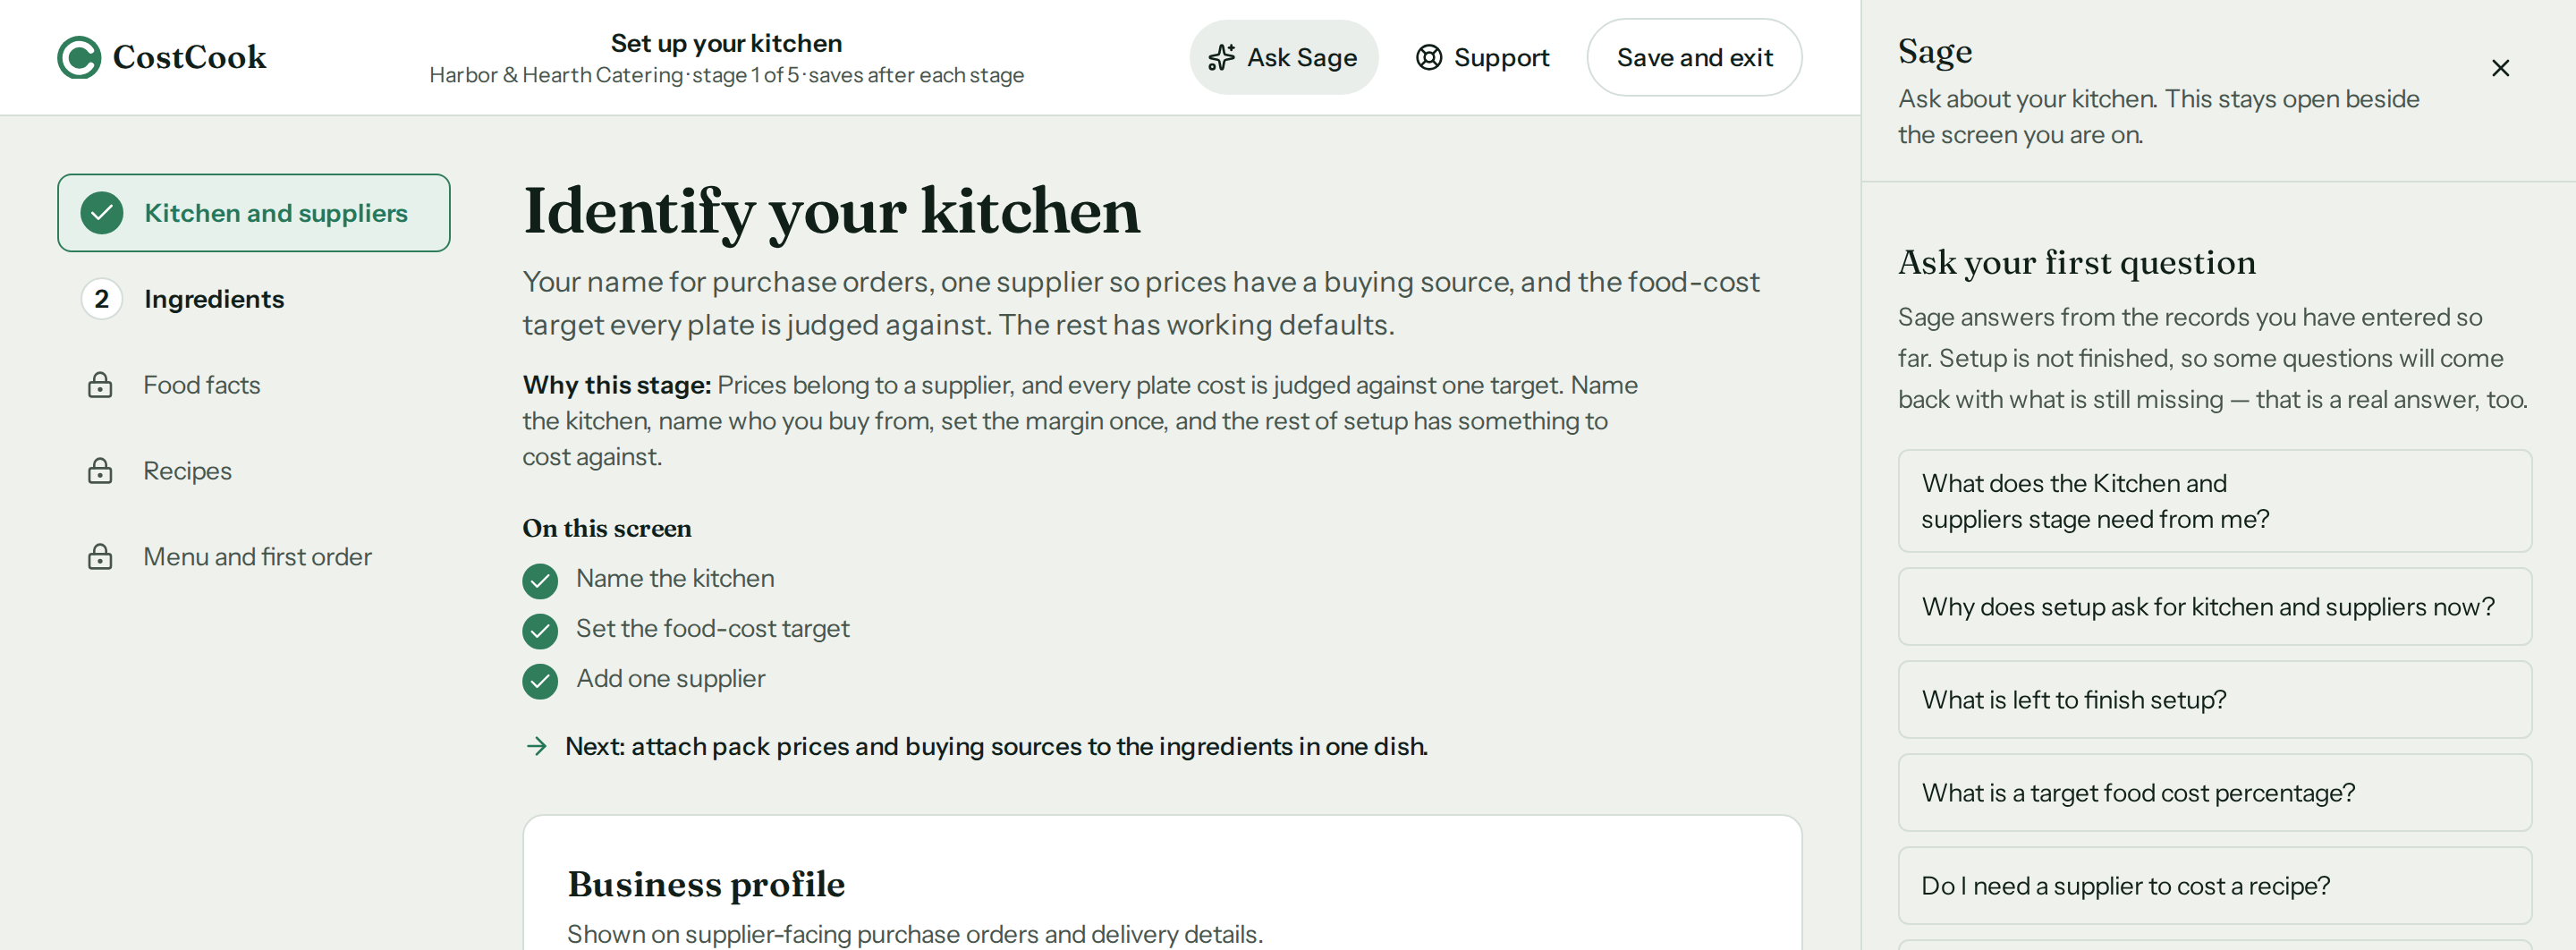
Stage one, with the five stages down the left and Sage open beside it. The stages stay there the whole way, ticking off as you go. Ingredients
Tap “Import an invoice or price sheet”, then “Choose files”, pick the photo of the invoice, and confirm the supplier, packs and prices that come back on “Review extracted records” instead of typing them.
Done when Confirm the ingredients, pack sizes and prices.
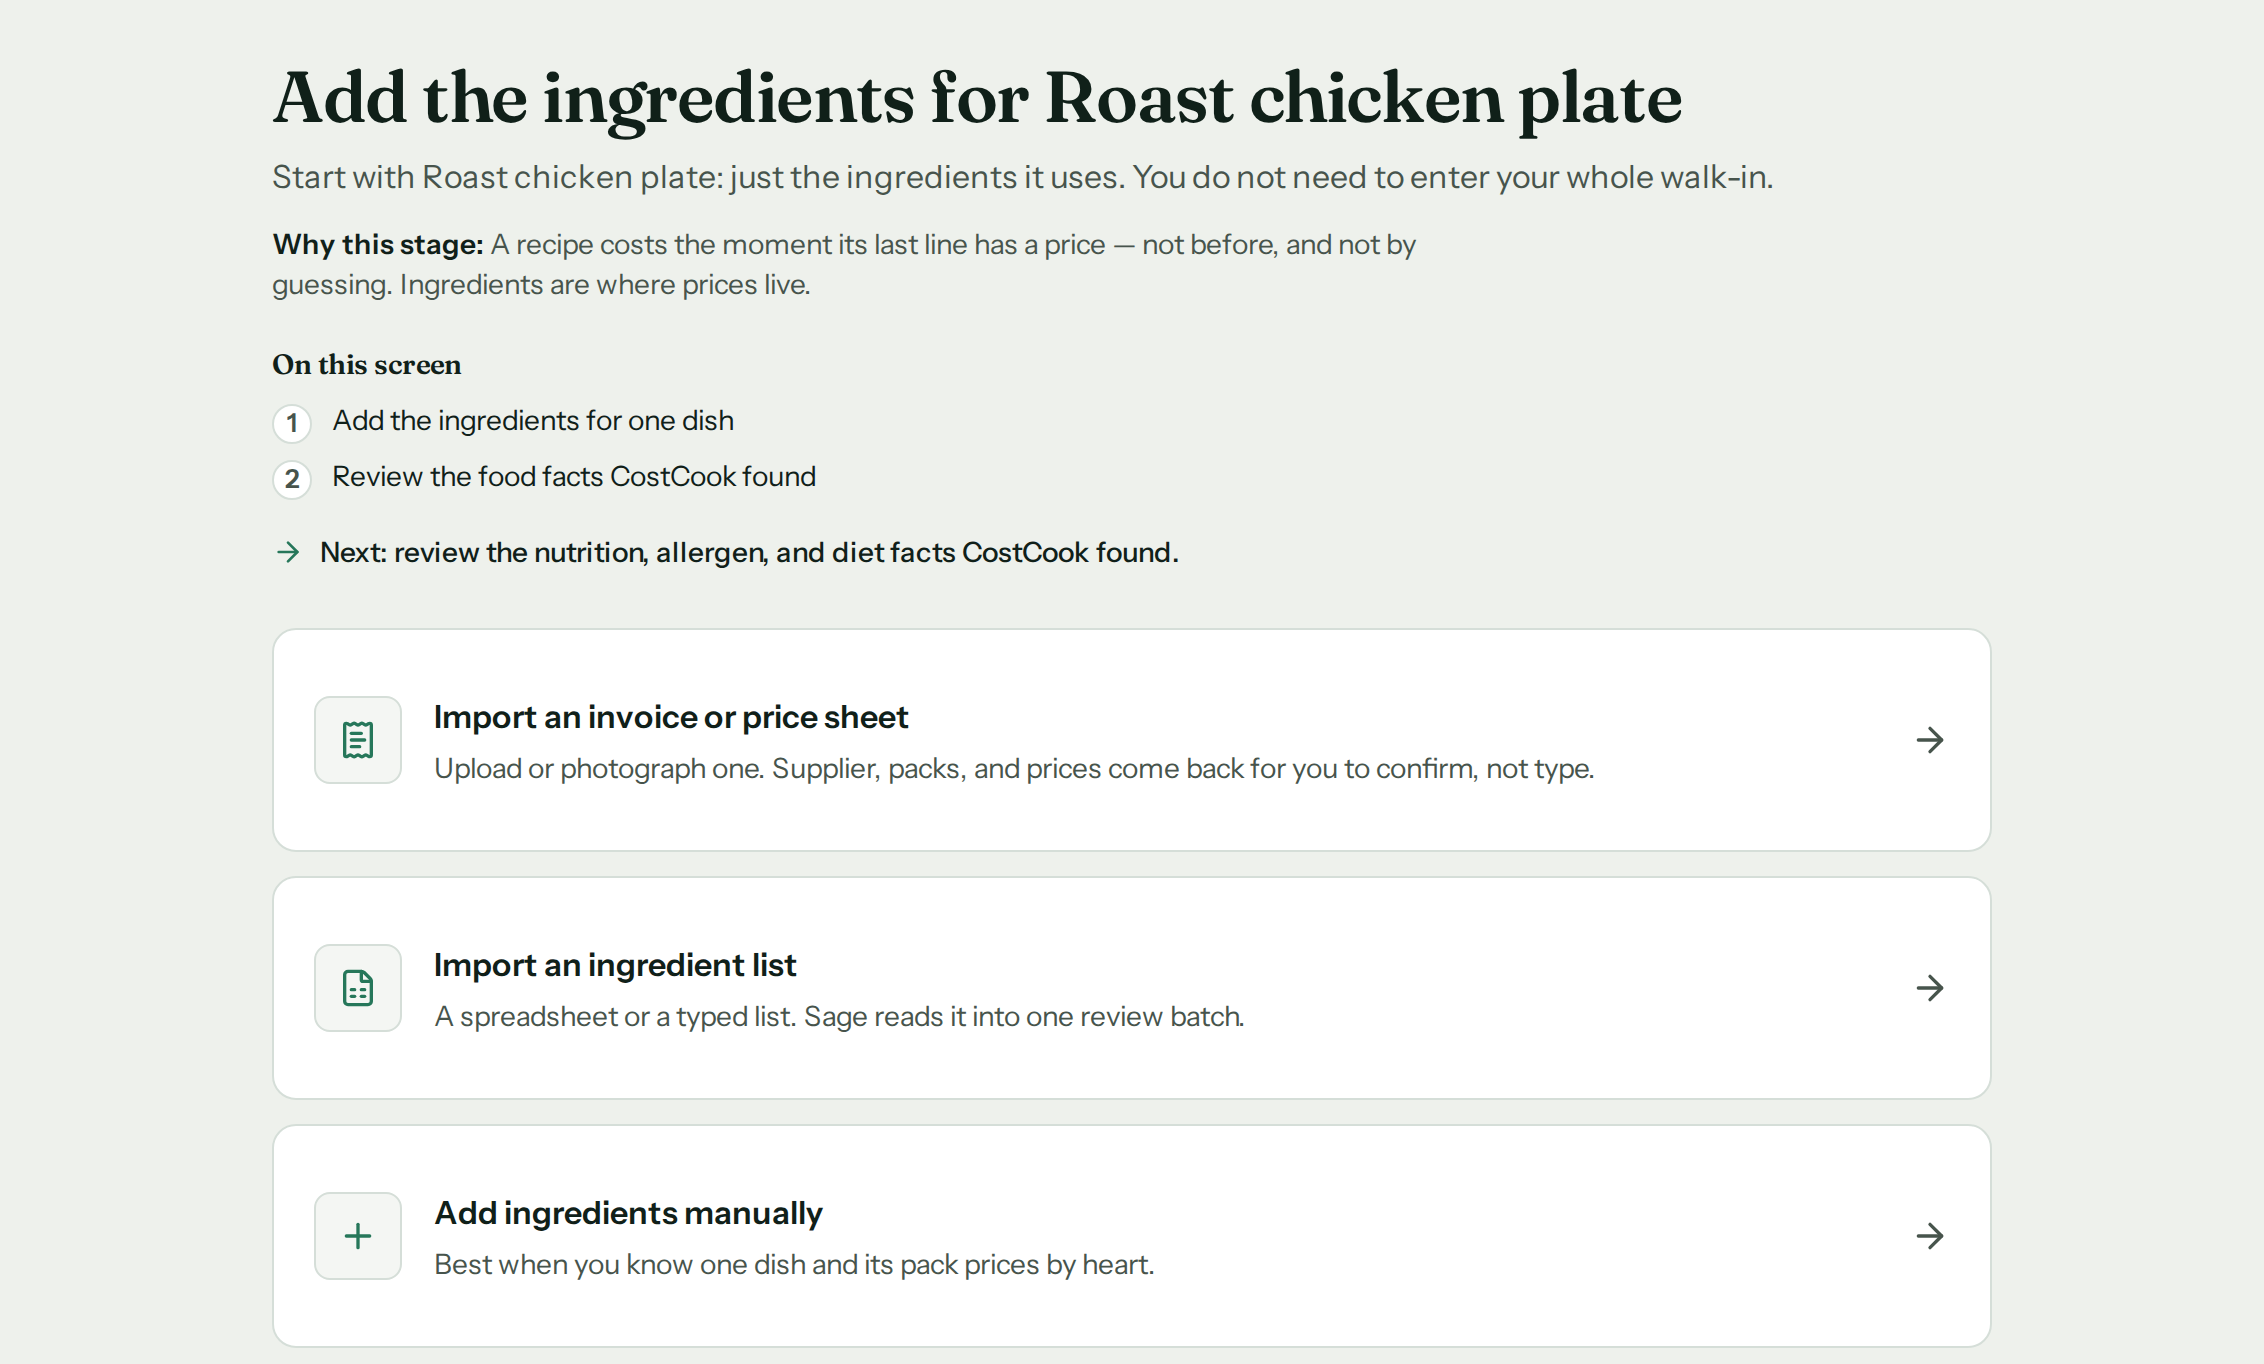
Stage two on an empty kitchen. The first card is the invoice; the form is the third. 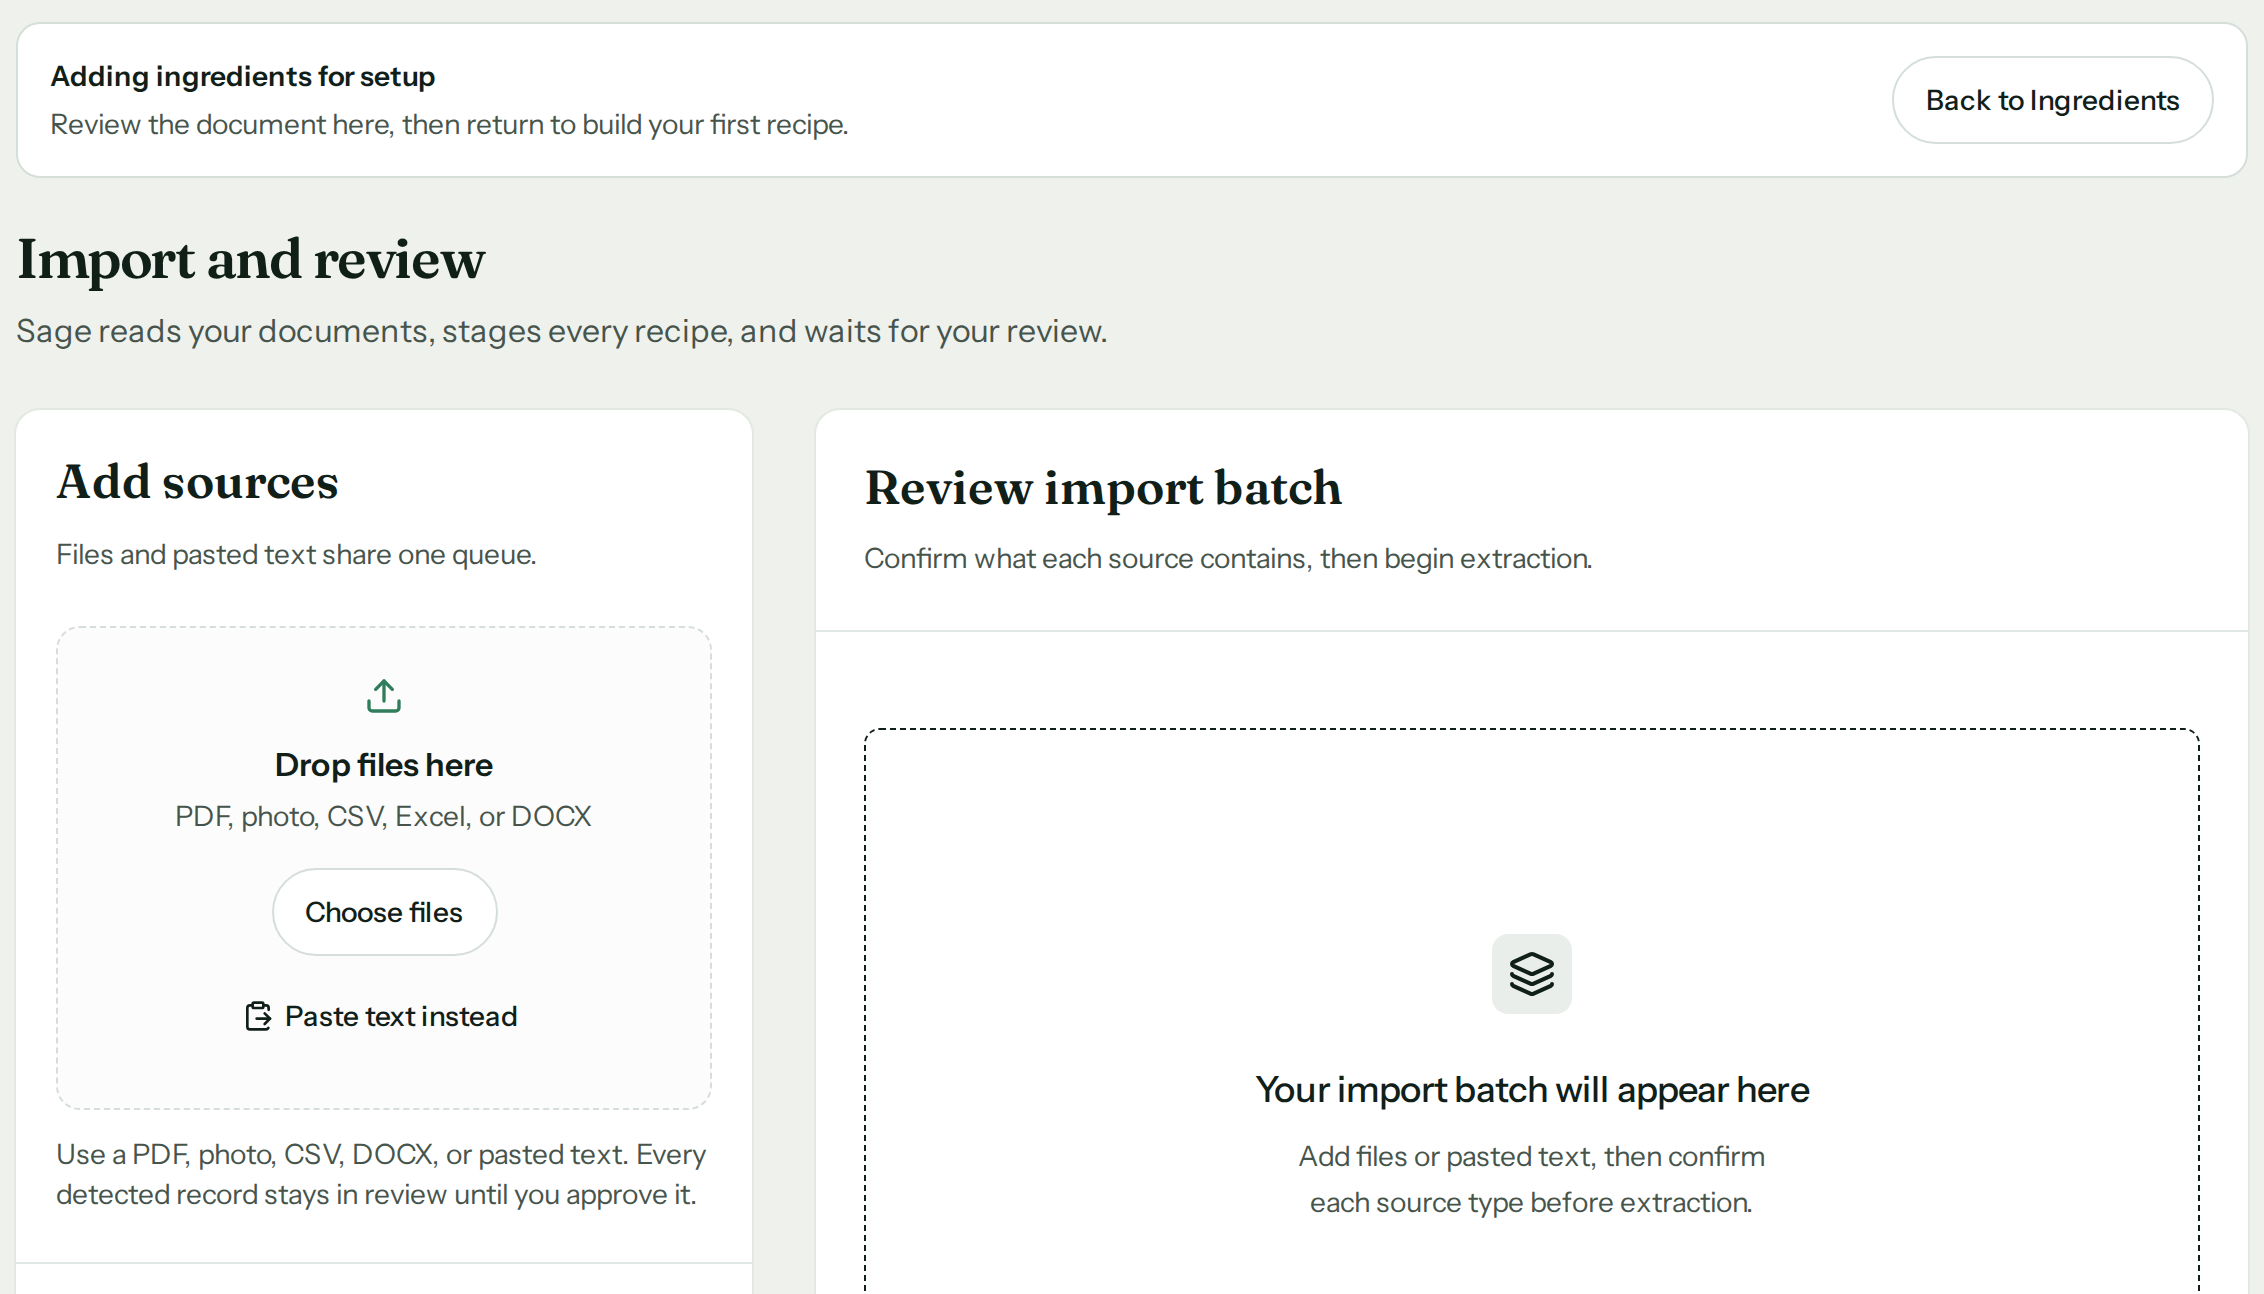
Behind the first card. “Choose files” opens your camera roll on a phone; the review lands in the panel on the right. Food facts
Sage drafts each ingredient’s allergens and diet facts for you to confirm, or “Skip for now” and every order that uses it reads “check”, never “clear”.
Done when Review each ingredient or leave it marked for checking.
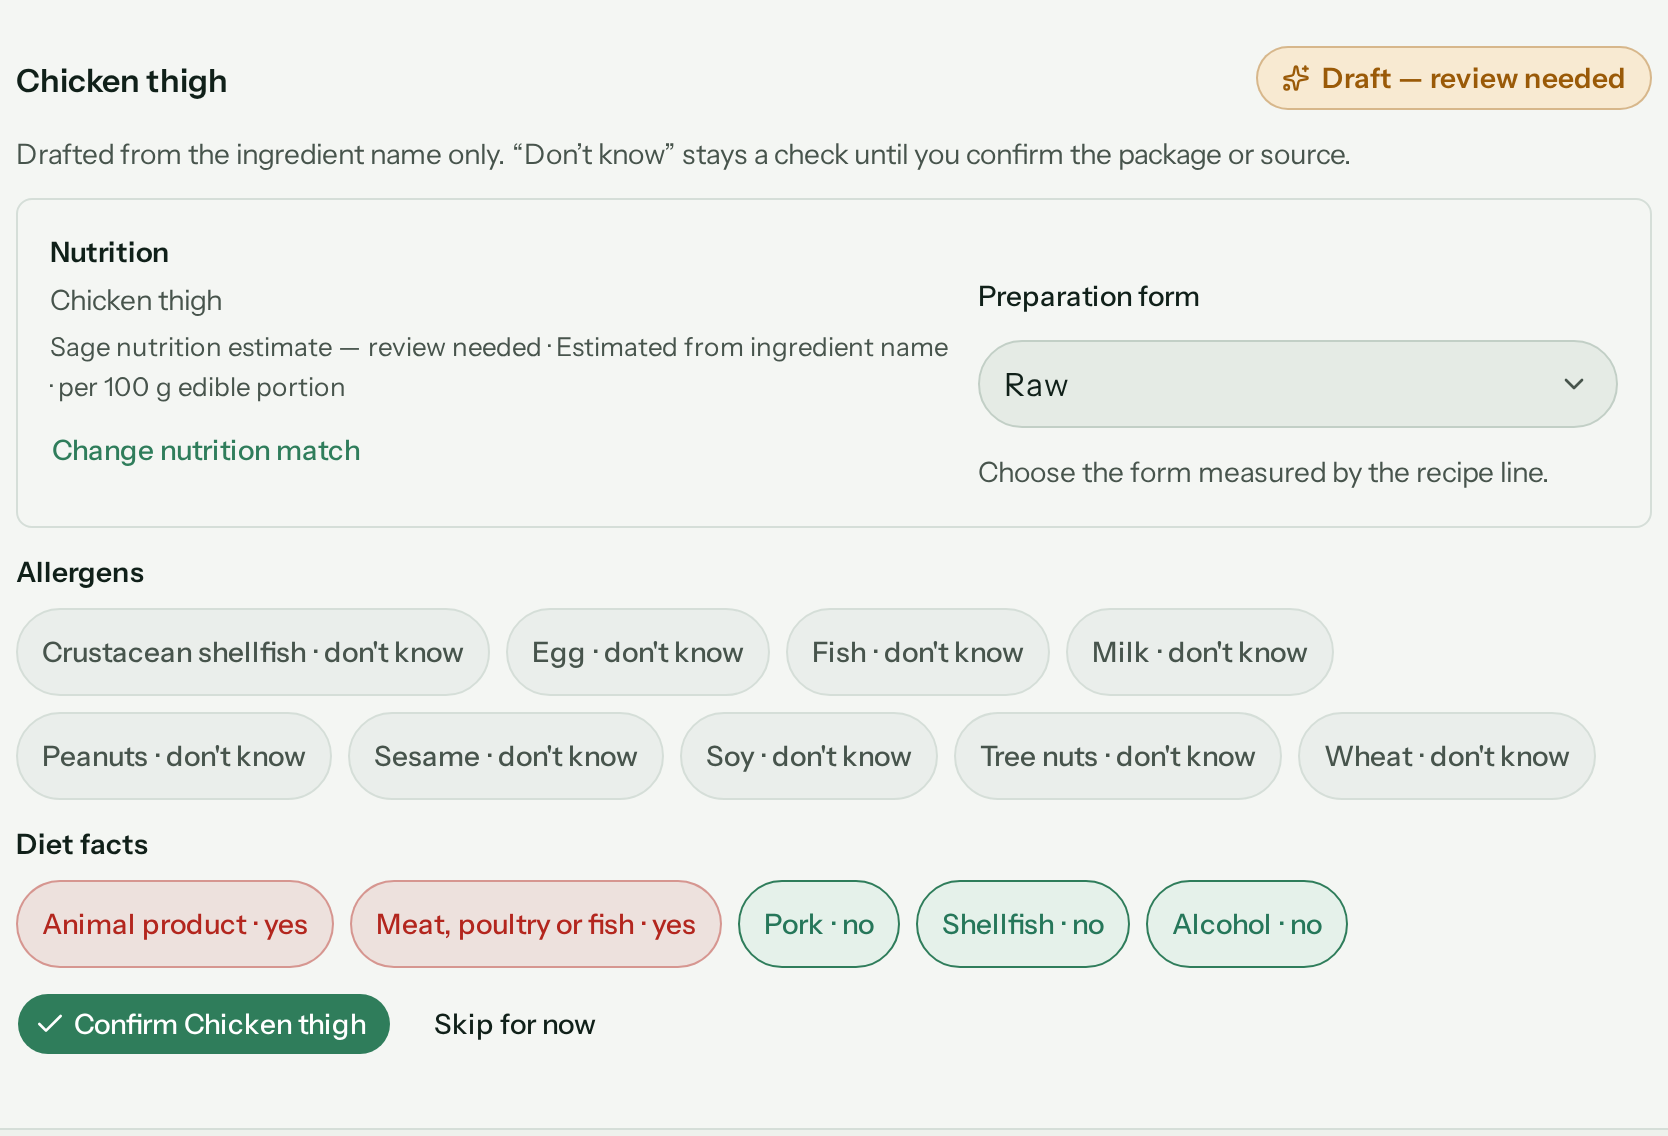
One ingredient’s card, as Sage drafted it. What it does not know stays “don’t know”, and don’t know is never read as clear. Recipes
Tap “Build with Sage”, then “Choose files”, then the photo of the recipe card, and read the draft it makes; review the ingredients and amounts, then check the food cost per portion.
Done when Check the plate cost.
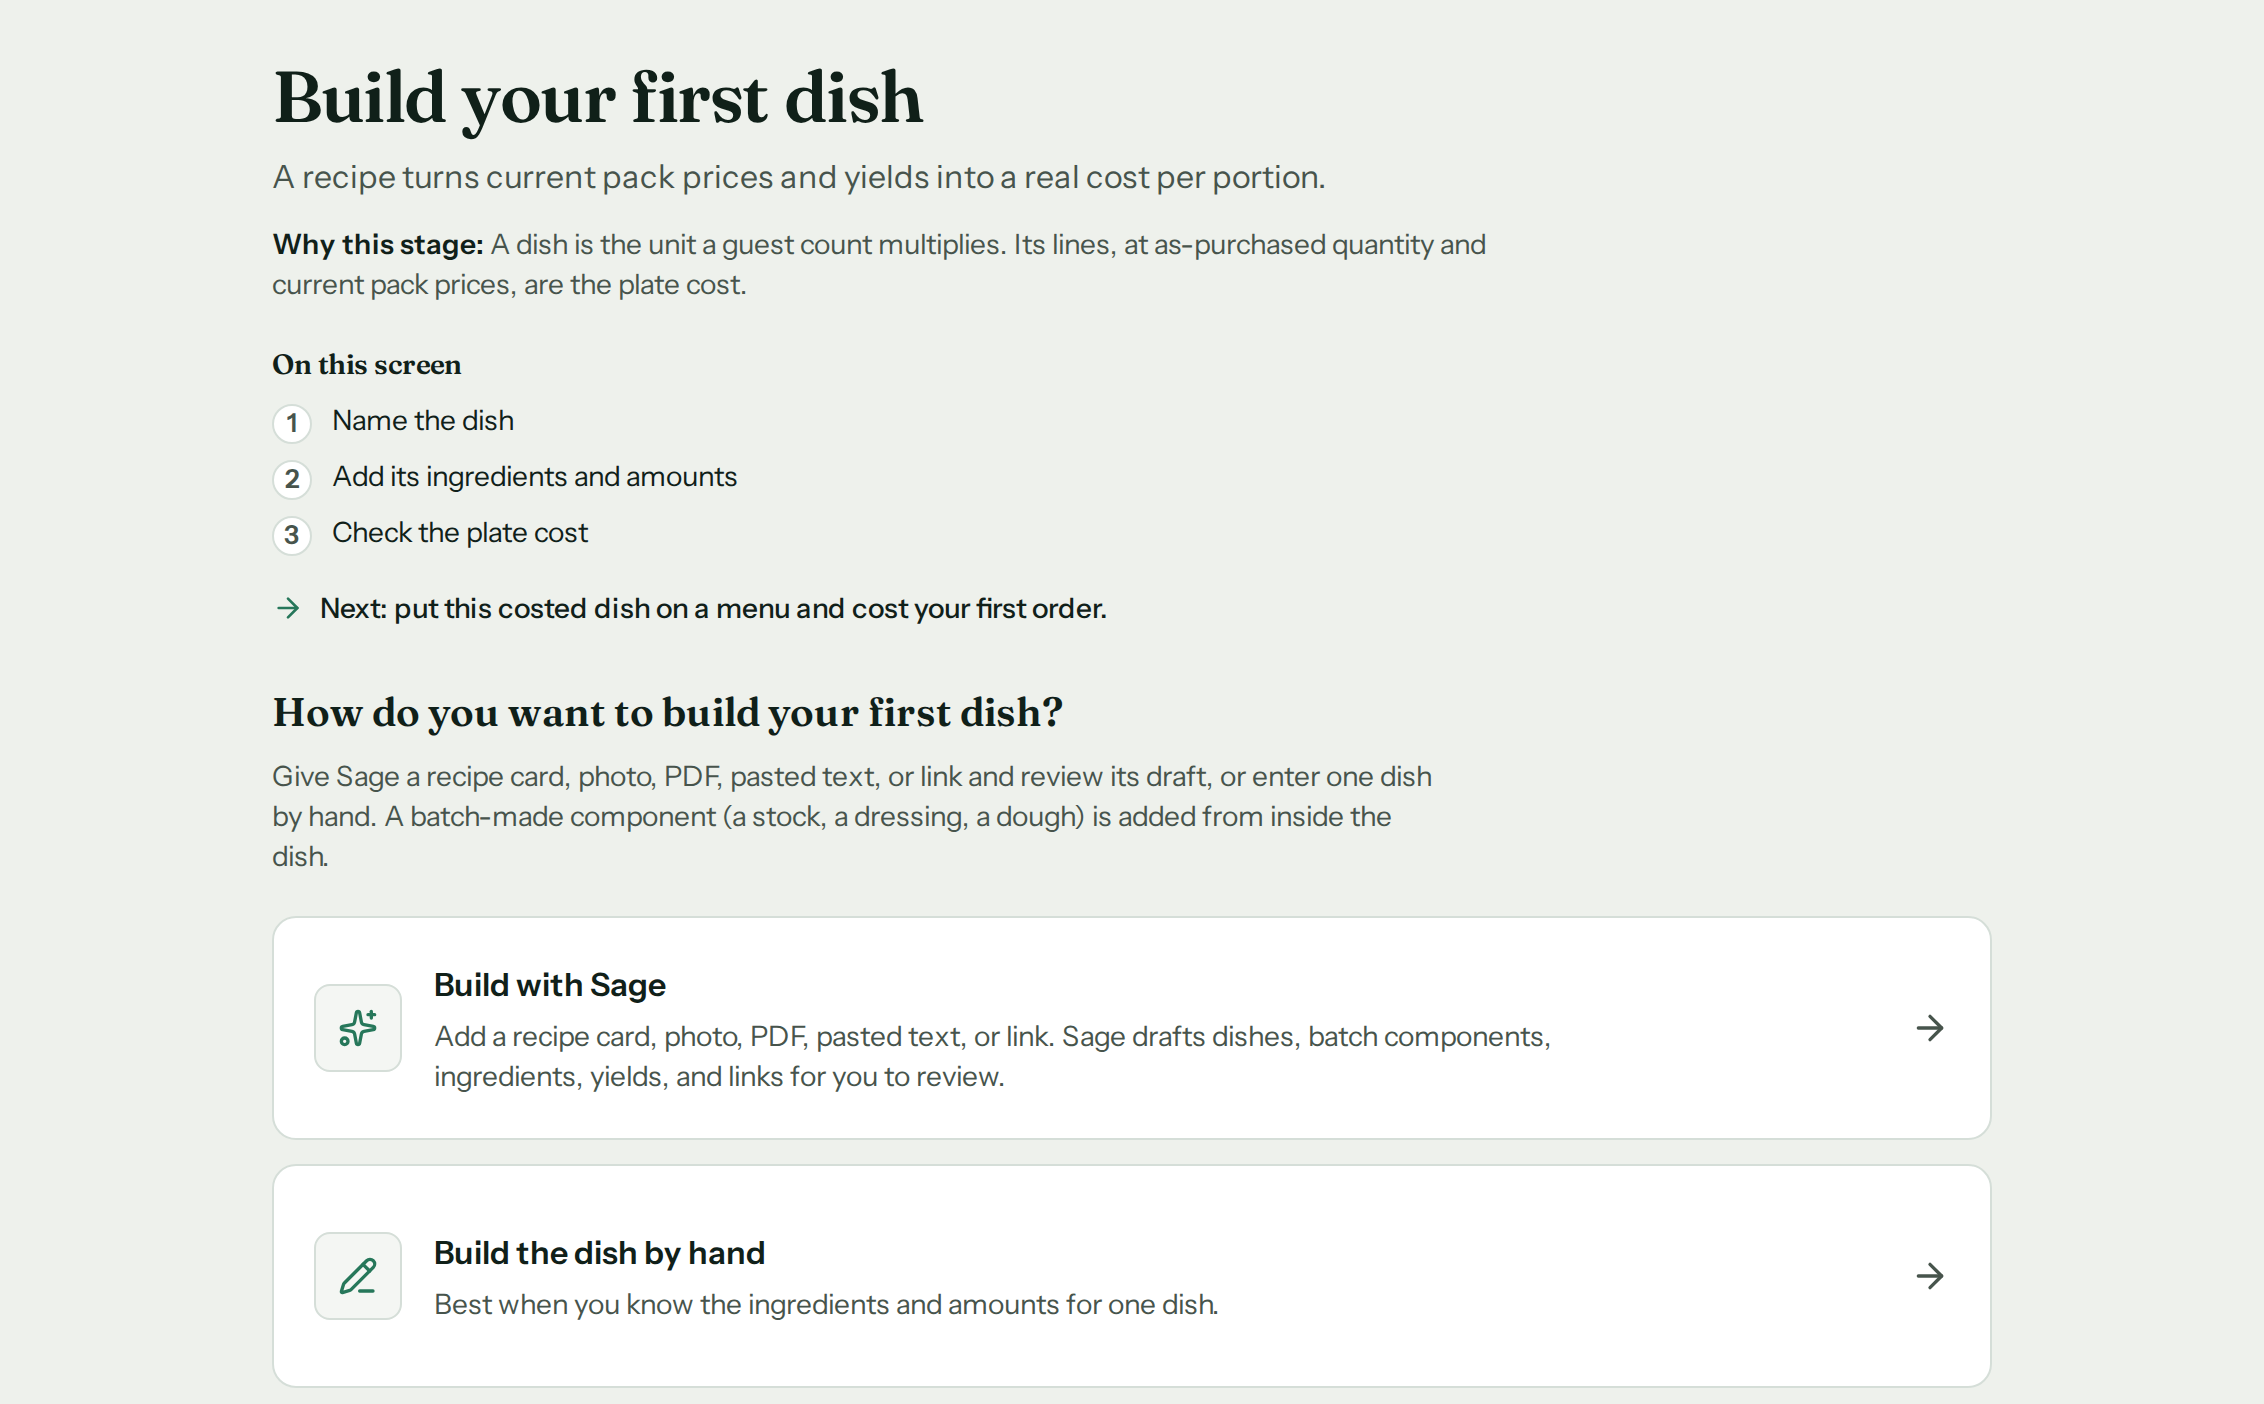
Stage four opens on the same shape as stage two. Sage first, the form second. Menu and first order
Fill in “Event date” and “Guests” and tap “Create first order”; the menu is already named after your dish.
Done when Add guests and a date, then cost the order.
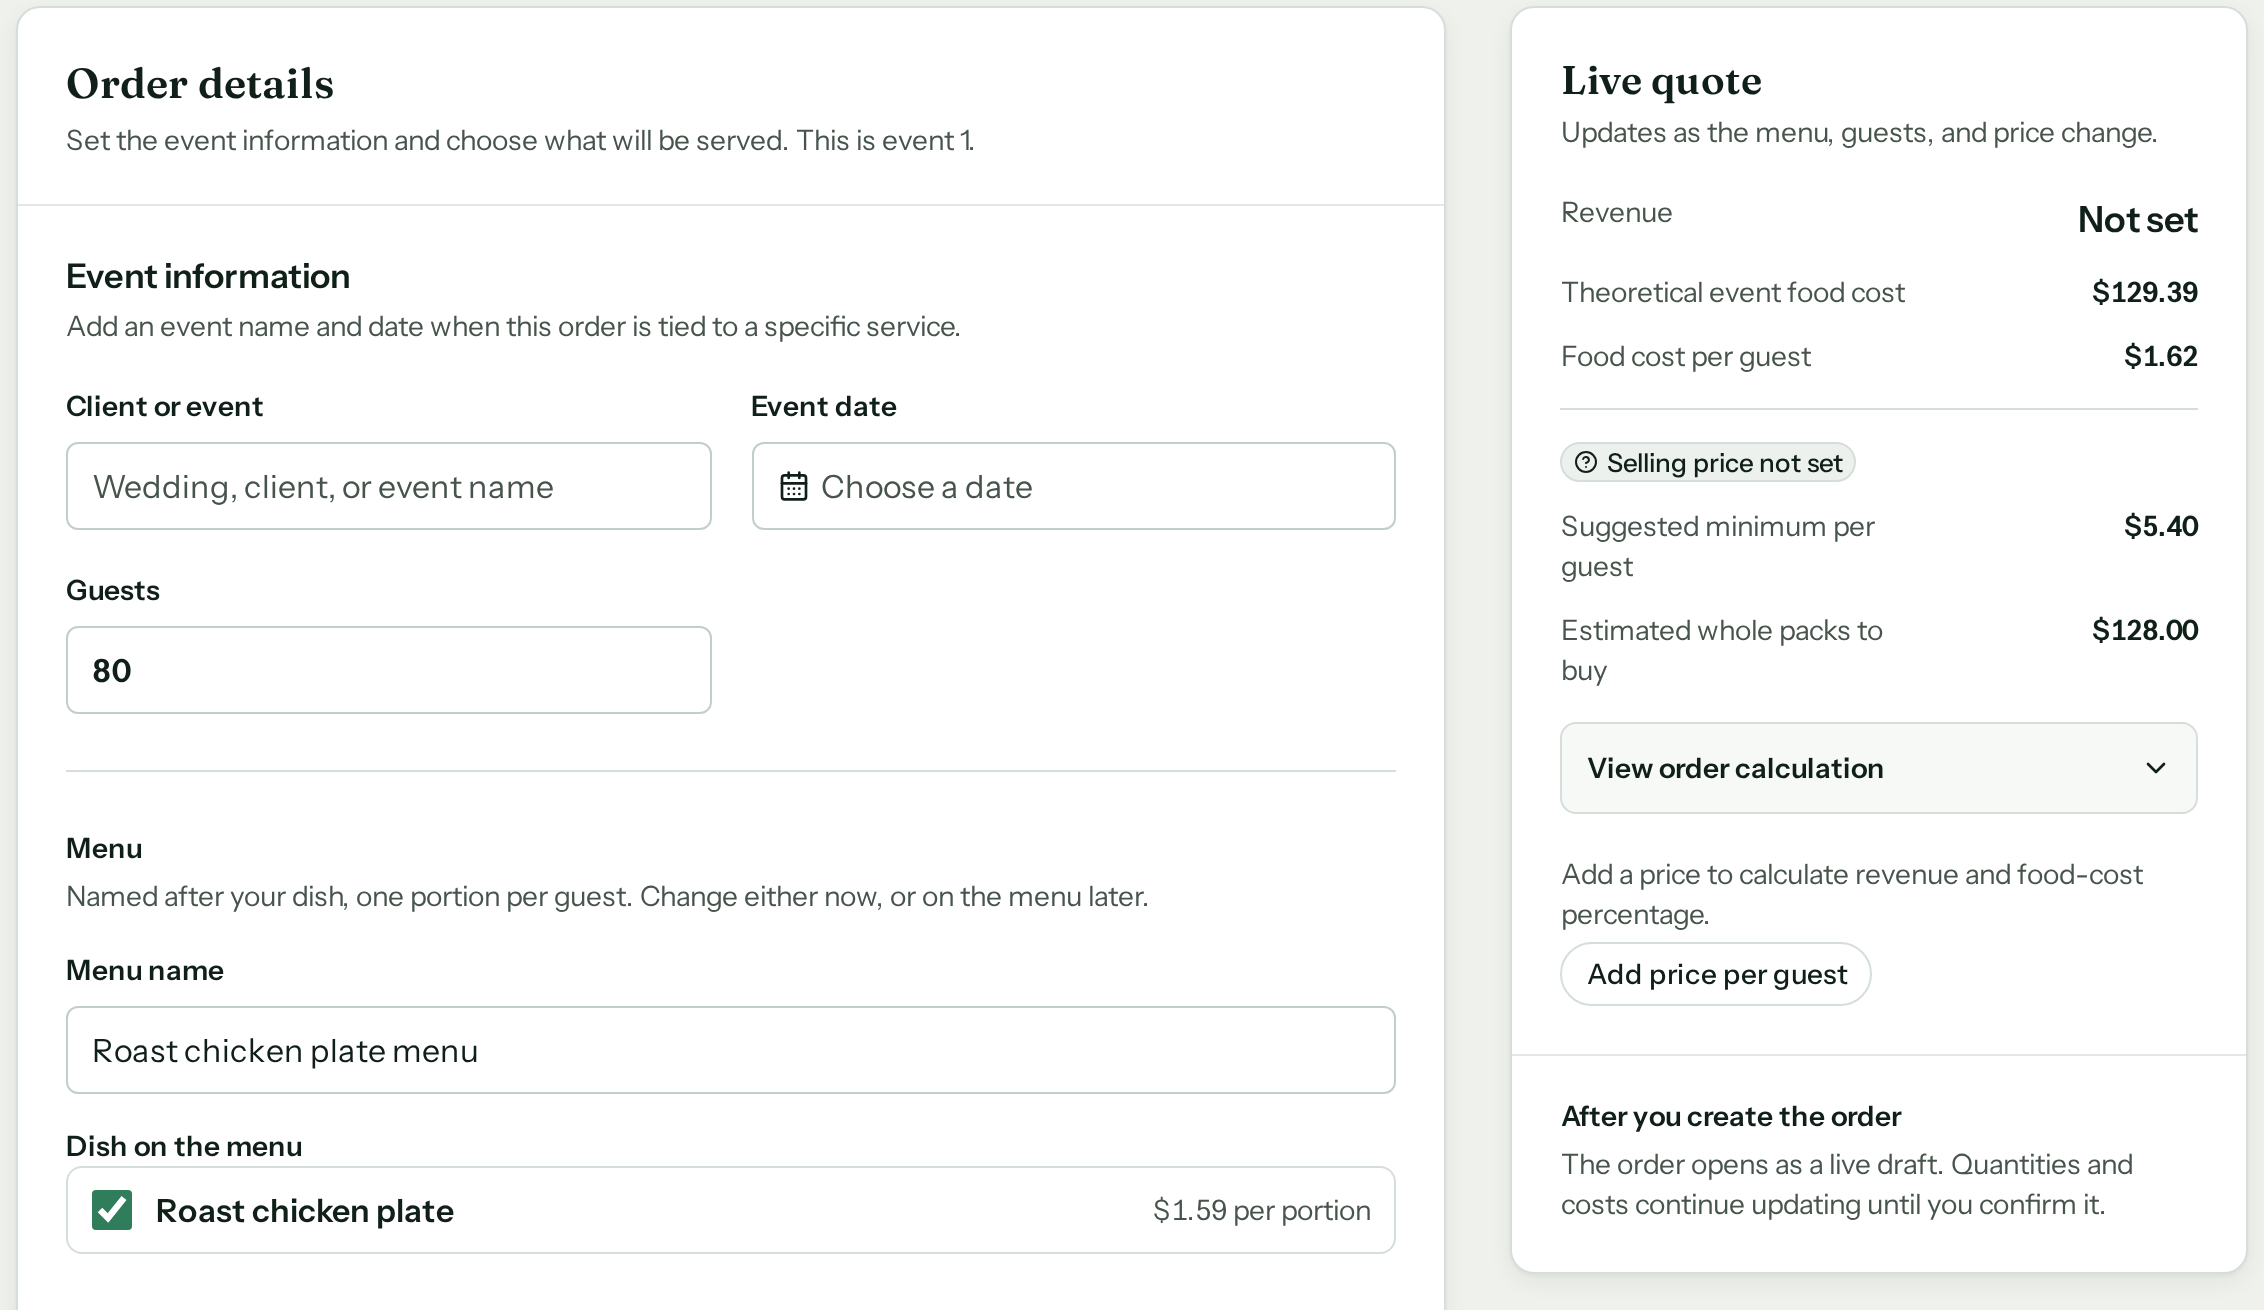
Stage five. The menu is already named after your dish, and the quote beside it already reads $1.62 a guest. The date, the guest count and one button are what is left.
Nothing that comes in through an upload is written to your kitchen until you confirm it, and what CostCook could not read is quoted back to you rather than guessed at.
Sage stays open beside whichever stage you are on. Its questions are the ones that stage raises, and it answers from the records you have entered so far. It reads them; it never fills a stage in for you.
Stage four ends on a number.
The number
Example: one ingredient costed from its case price.
180 g of chicken thigh, bought at $32.00 for a 10 lb case, 80% of it surviving the trim.
A $32 case of thighs, 80% usable after trim, 180 g on the plate, plus 2% misc: $1.62. Check it on paper. We would rather you did.
Plate cost, as the screen prints it
| Step | Result | Reading |
|---|---|---|
| $32.00 ÷ 4,535.92 g | $0.0070548 / g | as purchased |
| ÷ 0.80 trim yield | $0.0088185 / g | usable |
| × 180 g on the plate | $1.59 | ingredient lines |
| + 2% misc (the default) | $0.03 | its own line |
| Plate cost | $1.62 | per portion |
What it refuses to do
A number you can check is only half of it.
The other half is what happens when you get something wrong.
- Leave a pack price blank and the ingredient does not go on. The screen says what it needs and puts your cursor in the field.
- Ask for 100 ml of something sold by weight and it stops, and it names the fix: pick a weight unit, or give the ingredient a density.
- Press “Start over” by mistake and your ingredients, recipes, menus and orders stay. Only the guide’s progress resets.
- Lose the wifi mid-save and nothing is written and nothing is claimed. What you typed is still on screen, and the same button retries.
After stage five, open your first shopping list or add the next dish.
Part 3 of 3 · After setup
Stage five ends on a screen that says your kitchen is ready. Tap “Open shopping list”.
That is tonight’s next step, and where the product tour picks up. “Go to Today” is the other door.
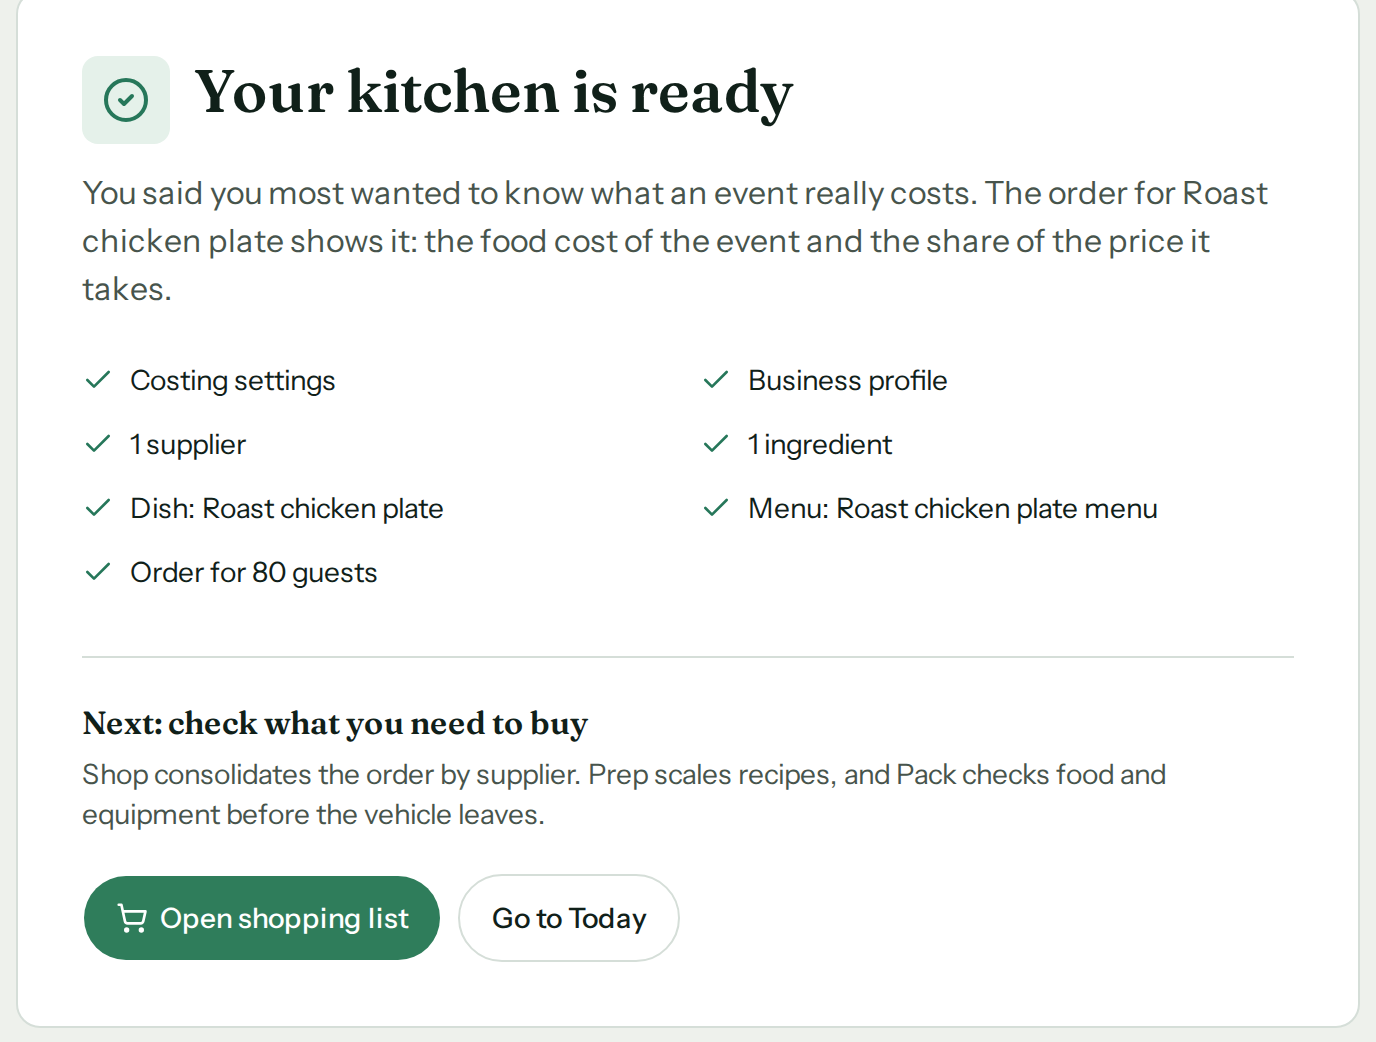
The first dish was the hard one. The rest come in the same way: upload, then confirm.
The rest of your menu
The next invoice and the next dish go into the same box.
The next invoice
Open Kitchen records, tap “Import invoice” on the Purchases card, and confirm the lines: the purchase is logged and every ingredient cost and draft order moves with it, without rewriting confirmed orders.
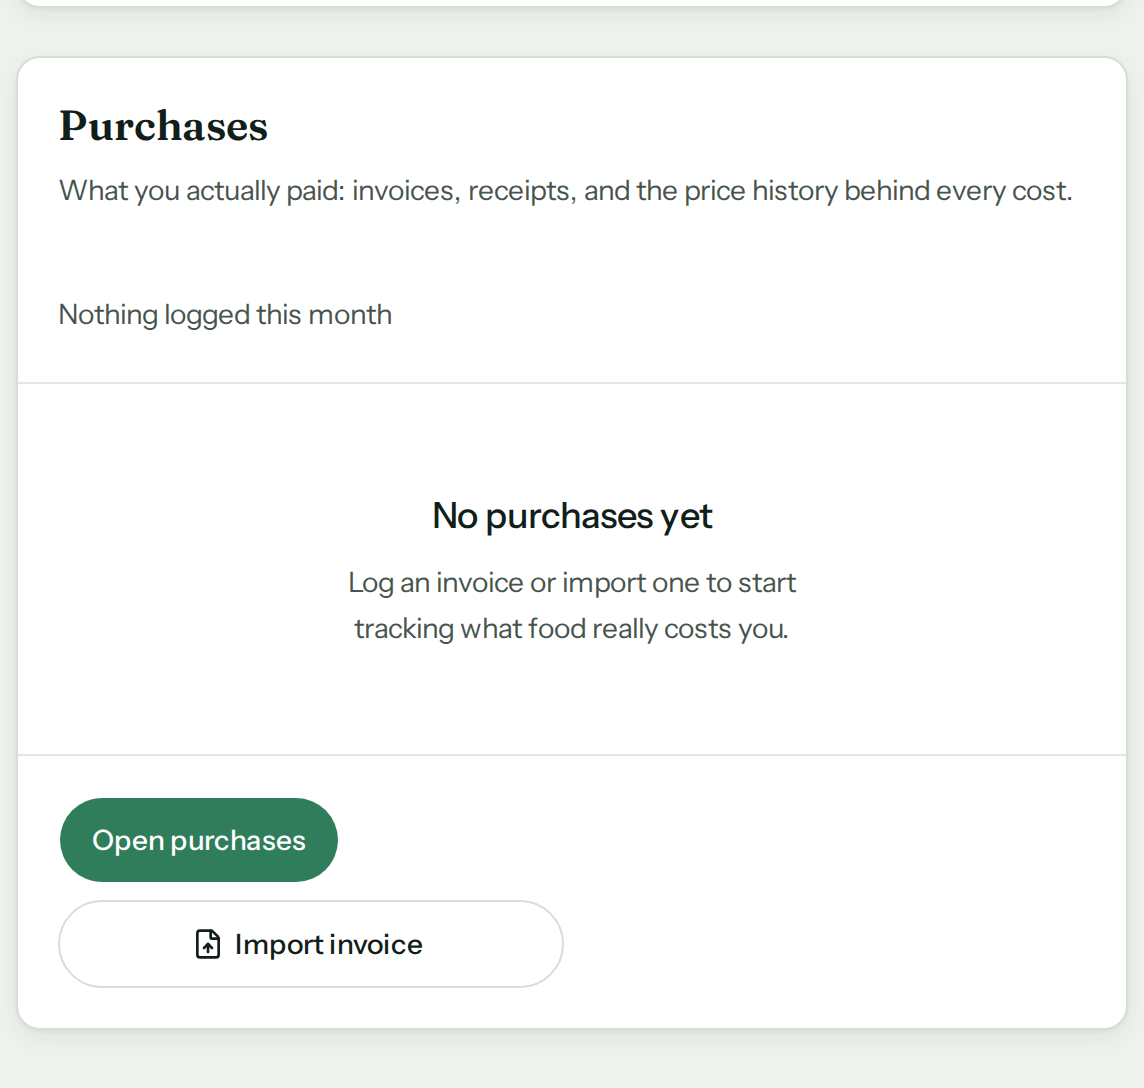
The Purchases card on Kitchen records. The next invoice goes in through “Import invoice”. The next dish
A recipe card goes into the same box as a photo, a PDF, a spreadsheet, a Word document or pasted text, and comes back as a draft for you to confirm, with anything it could not read quoted back as it appeared.
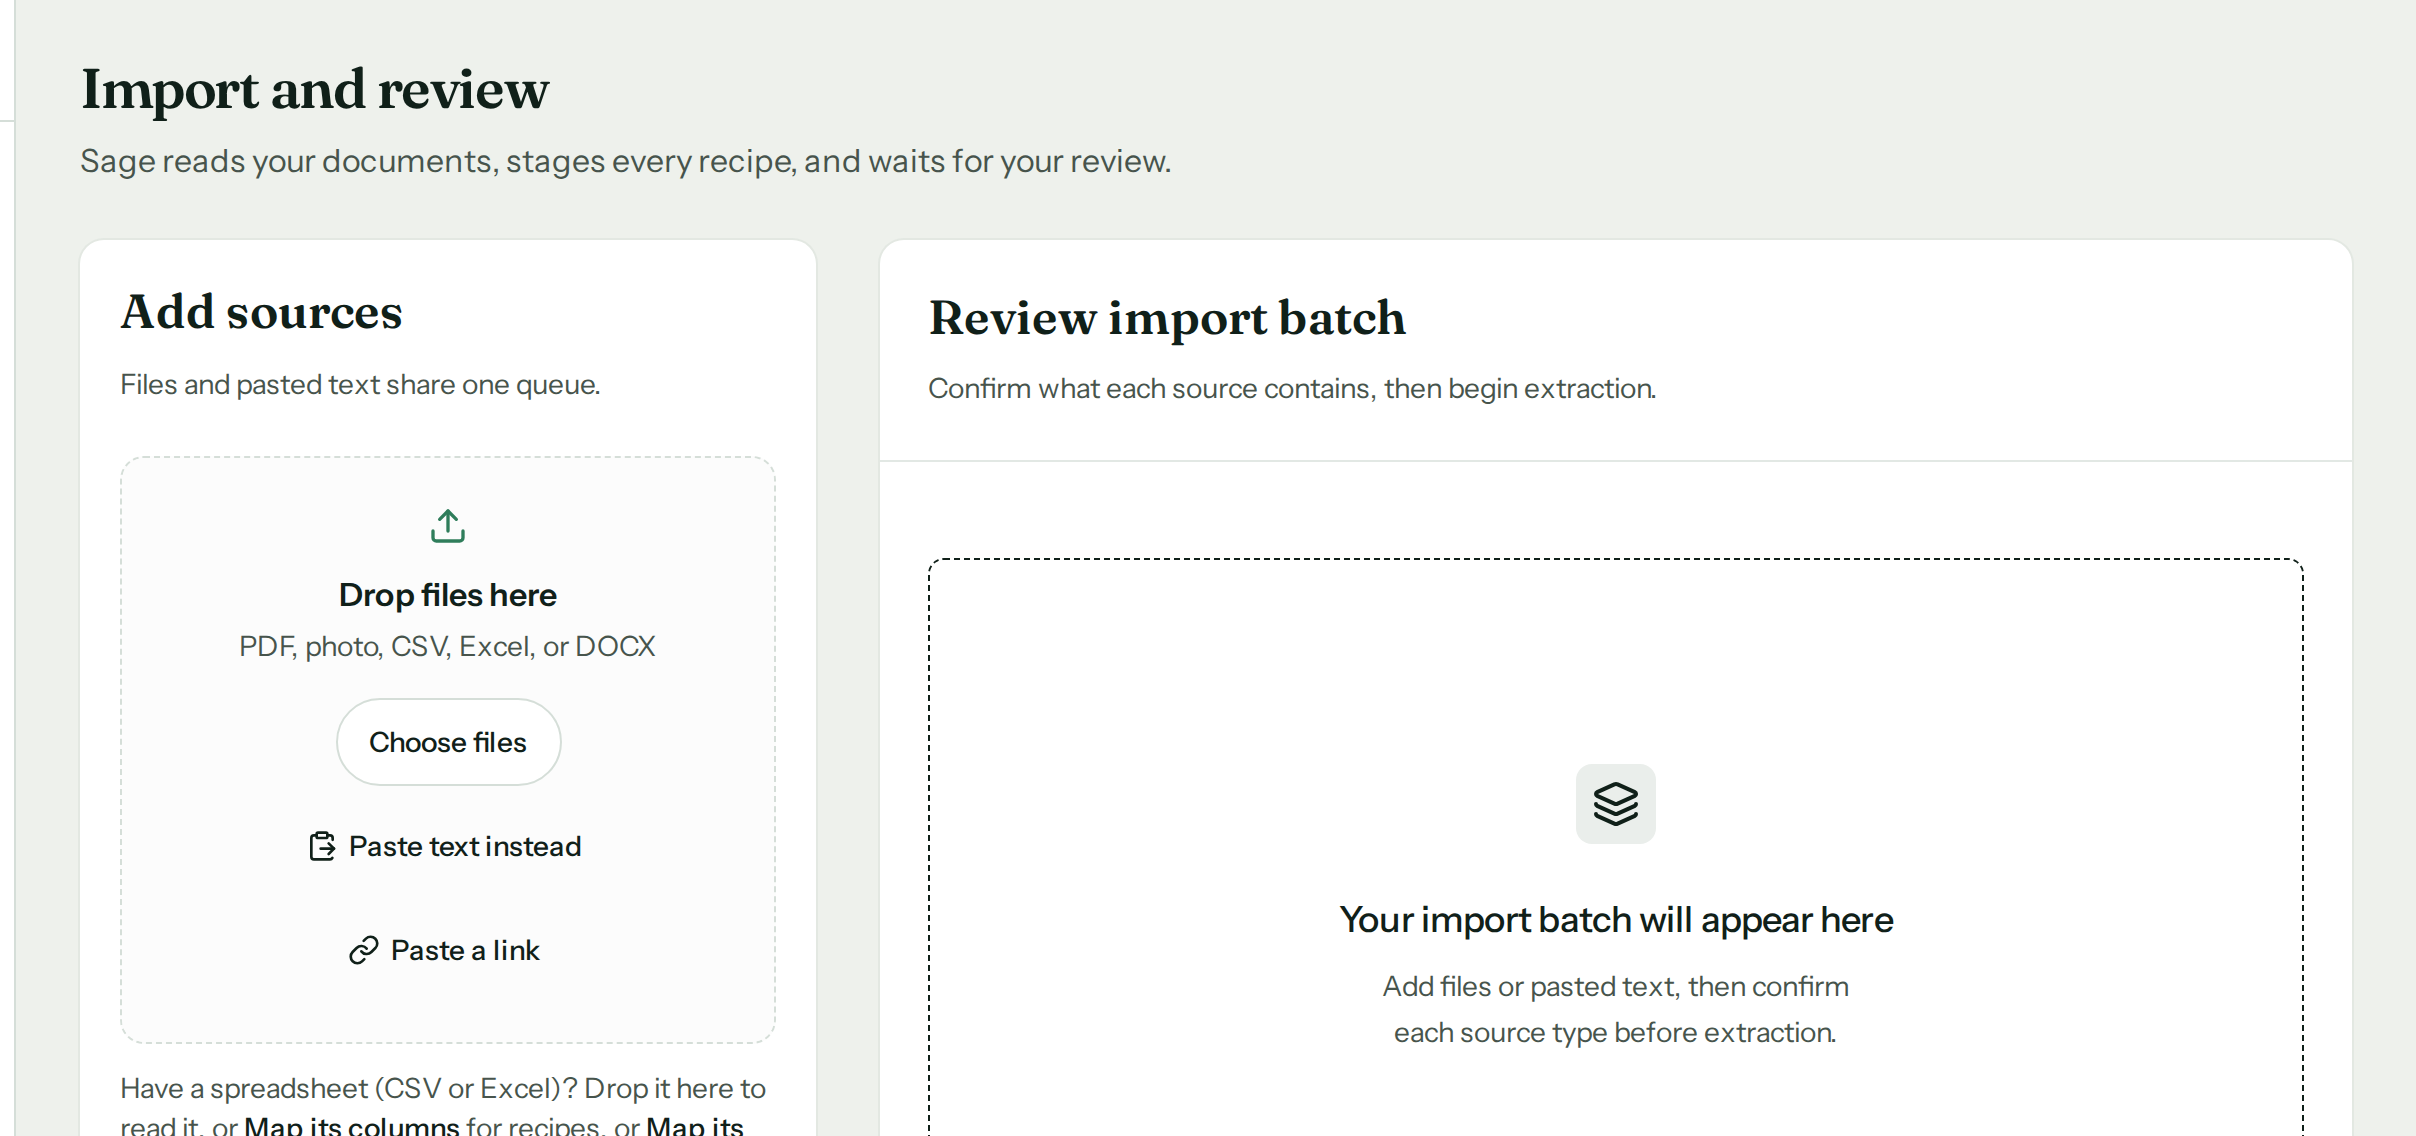
The same box, outside setup. One queue for invoices, price sheets, ingredient lists and recipe cards.
Once your first order is ready, invite the crew to work from its lists.
The rest of your crew
The crew joins from a link, and works from the list you built.
Invite a teammate
Open Settings, then Team & access, type an email address and tap “Send invitation”; they receive a one-time link to join this kitchen, no password needed, and land on the shopping list you just made.
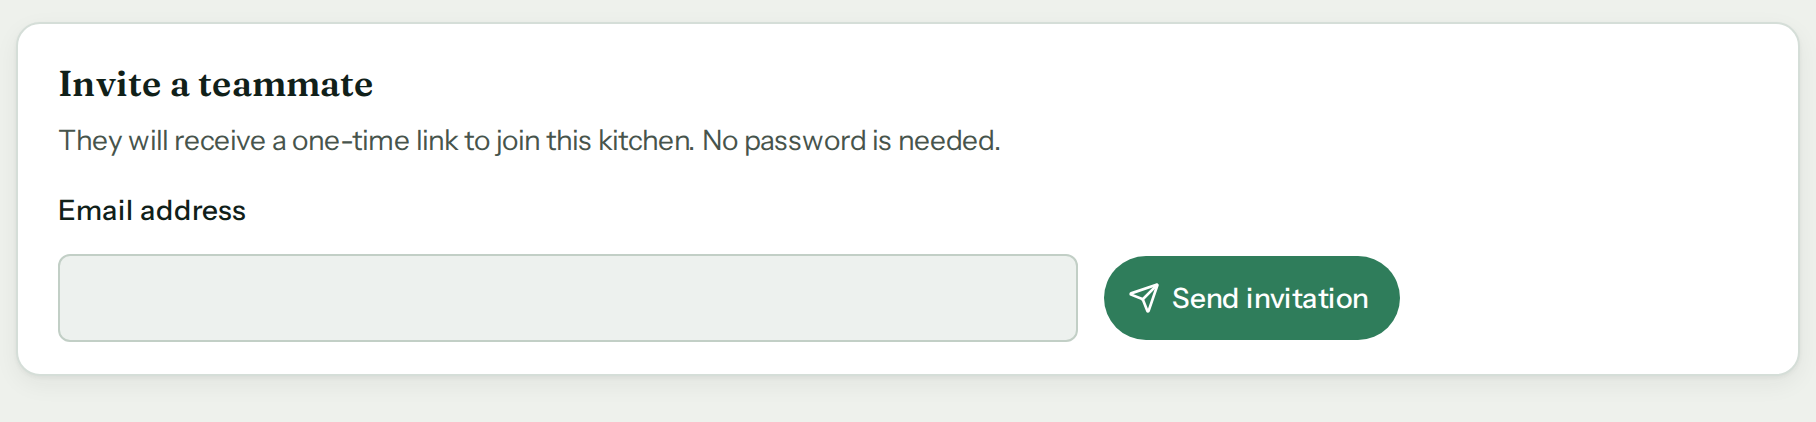
Settings, then Team & access. One field, one button.
Invited teammates join as Staff today. Staff can open cost screens, and there is no custom role; the full Owner, Manager and Staff boundary, and what each can and cannot open, is on the Team and Access guide.
Where this leaves you
Check one dish’s cost. Then add your next recipe and invite the crew.
The alternative is another season where the number in your head and the number on the invoice are two different numbers, and the crew works from a text message.
One dish, and you will know. Then they will too.