The client fills in the order. You approve it.
Put your menus on an ordering page of your own, or on the website you already have. The request comes in priced. If your booking rules ask for money up front and you take cards through CostCook, the client pays by card from a link.
In the app today Find it under Settings > Integrations > Ordering site.
Founding offer open now: 15 days free, then $49/month per kitchen, locked in for life. Limited to the first 20 kitchens. Regular price $99/month per kitchen; unlimited crew. Prices plus tax. Card required; $0 today. Cancel before day 16 in Settings → Billing, no call required. What to prepare · Plan and team limits
Read what the film shows
- A client orders lunch for 40 on your site.
- The client sees the price before anyone calls.
- It arrives priced. Food cost 29.3%, with misc.
- Clear day, priced menu, so it approved itself. You can still decline.
- The client gets a pay link and pays $1,273.08 by card.
- Nobody typed the order twice or chased the money.
- Whole packs, by supplier, for 40. The rest stays on the shelf.
- Each supplier gets only its own lines.
- A prep order the crew works top to bottom.
- 2 stuffed peppers, and no clashes with the guests’ restrictions.
- The next day it came in $2.47 over plan, still under your 30% target at 29.1% without misc.
Two ways in. Keep the website you have.
Both show the same menus, prices and dates, and send the request to the same place in Orders. The client never needs a login.
Your link
A page of your own.
Copy it into an email or a text, or print the QR code on a flyer or the menu you leave with a lunch drop.
On your website
Or a form on your own website.
The order form sits right on your own page, under your own heading. One small script loads it in a sealed frame, so it can’t touch the rest of your site.
What your client sees
Pick
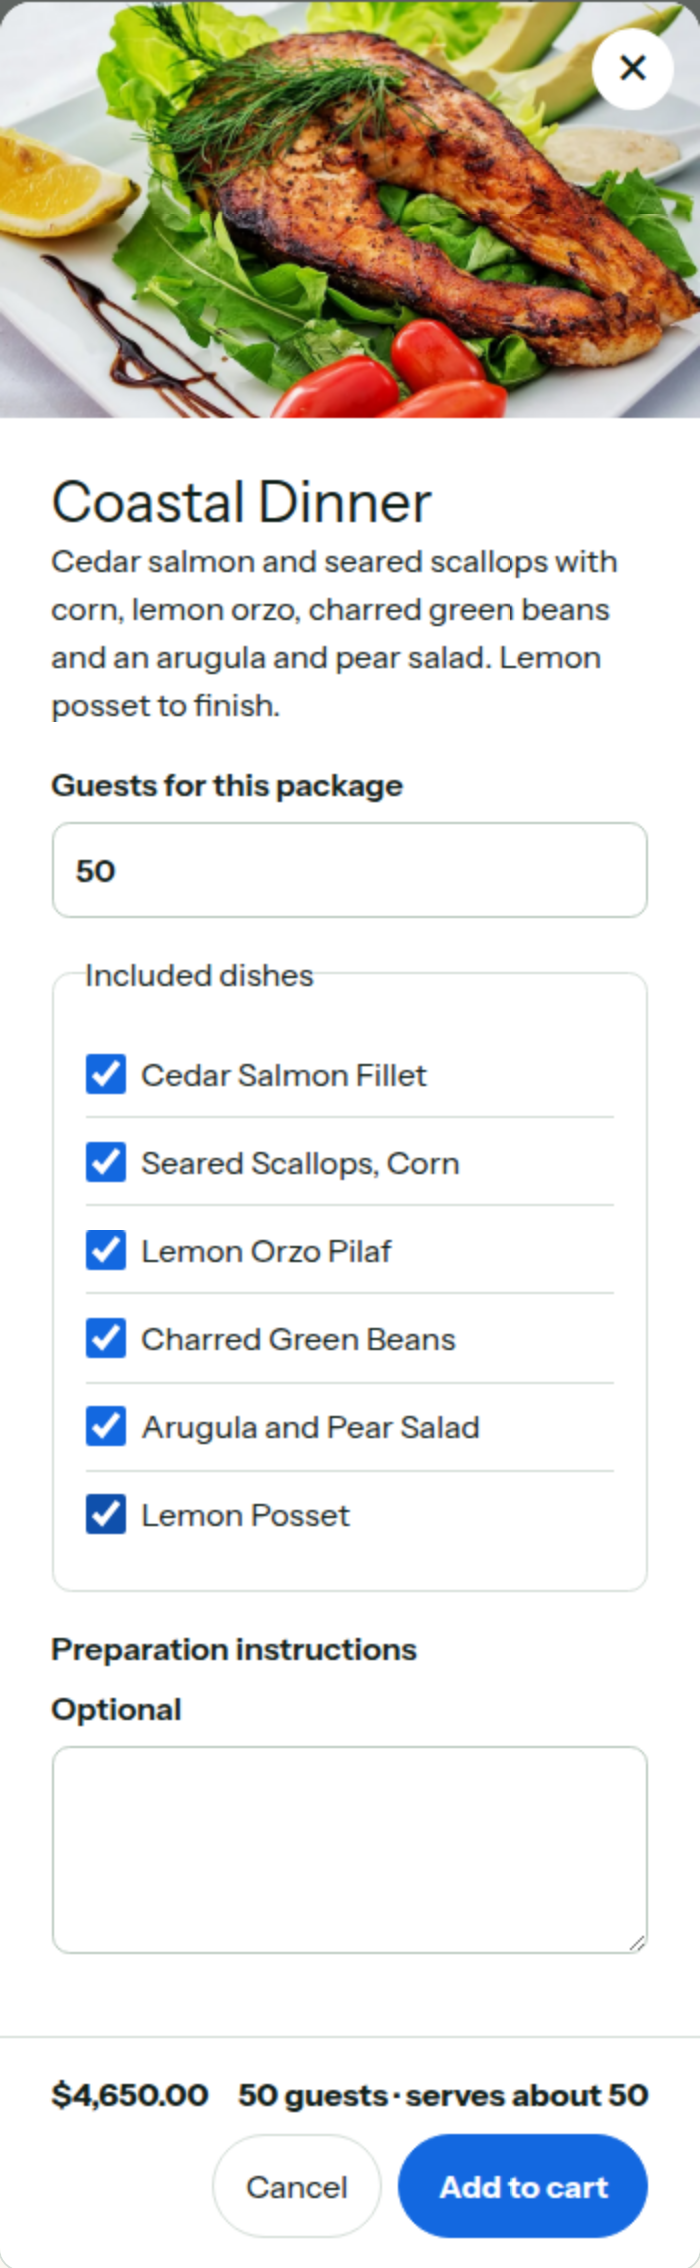
They open a package, set the head count, and the price follows: 50 guests, $4,650.00. Check
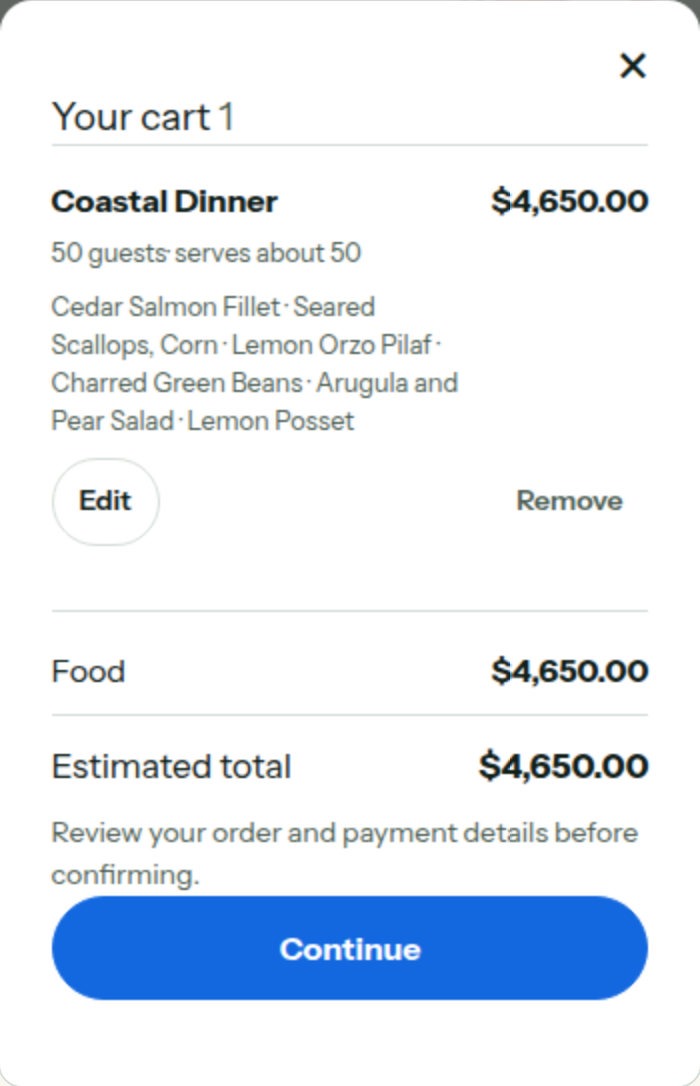
The cart keeps the estimate in front of them before they give any details. Send
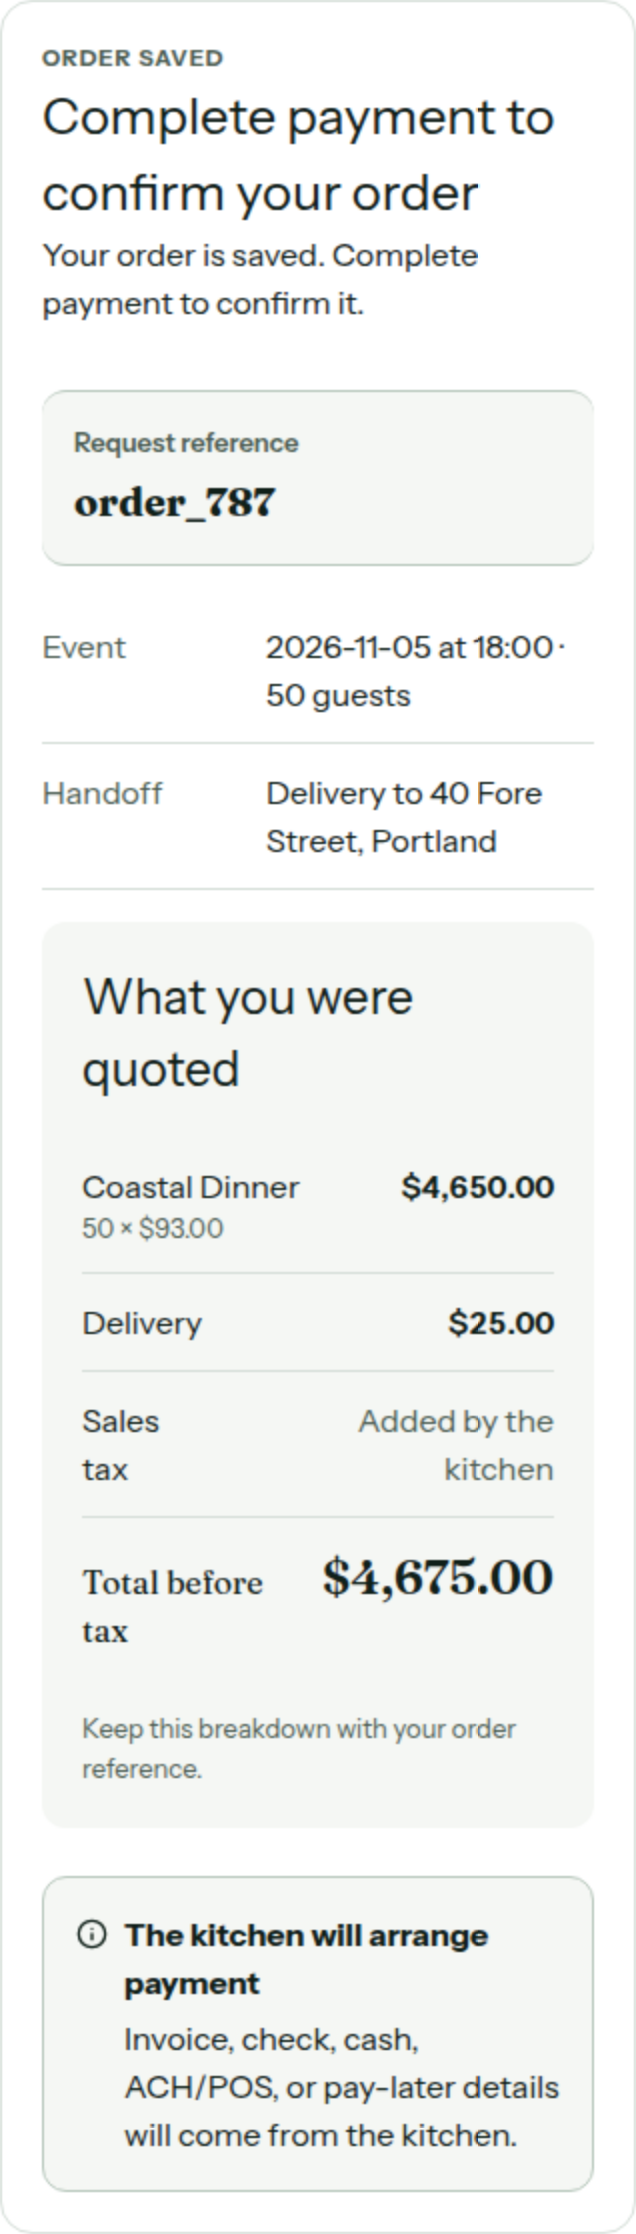
Sent. They keep a reference and what they were quoted, delivery included, before tax. Or ask
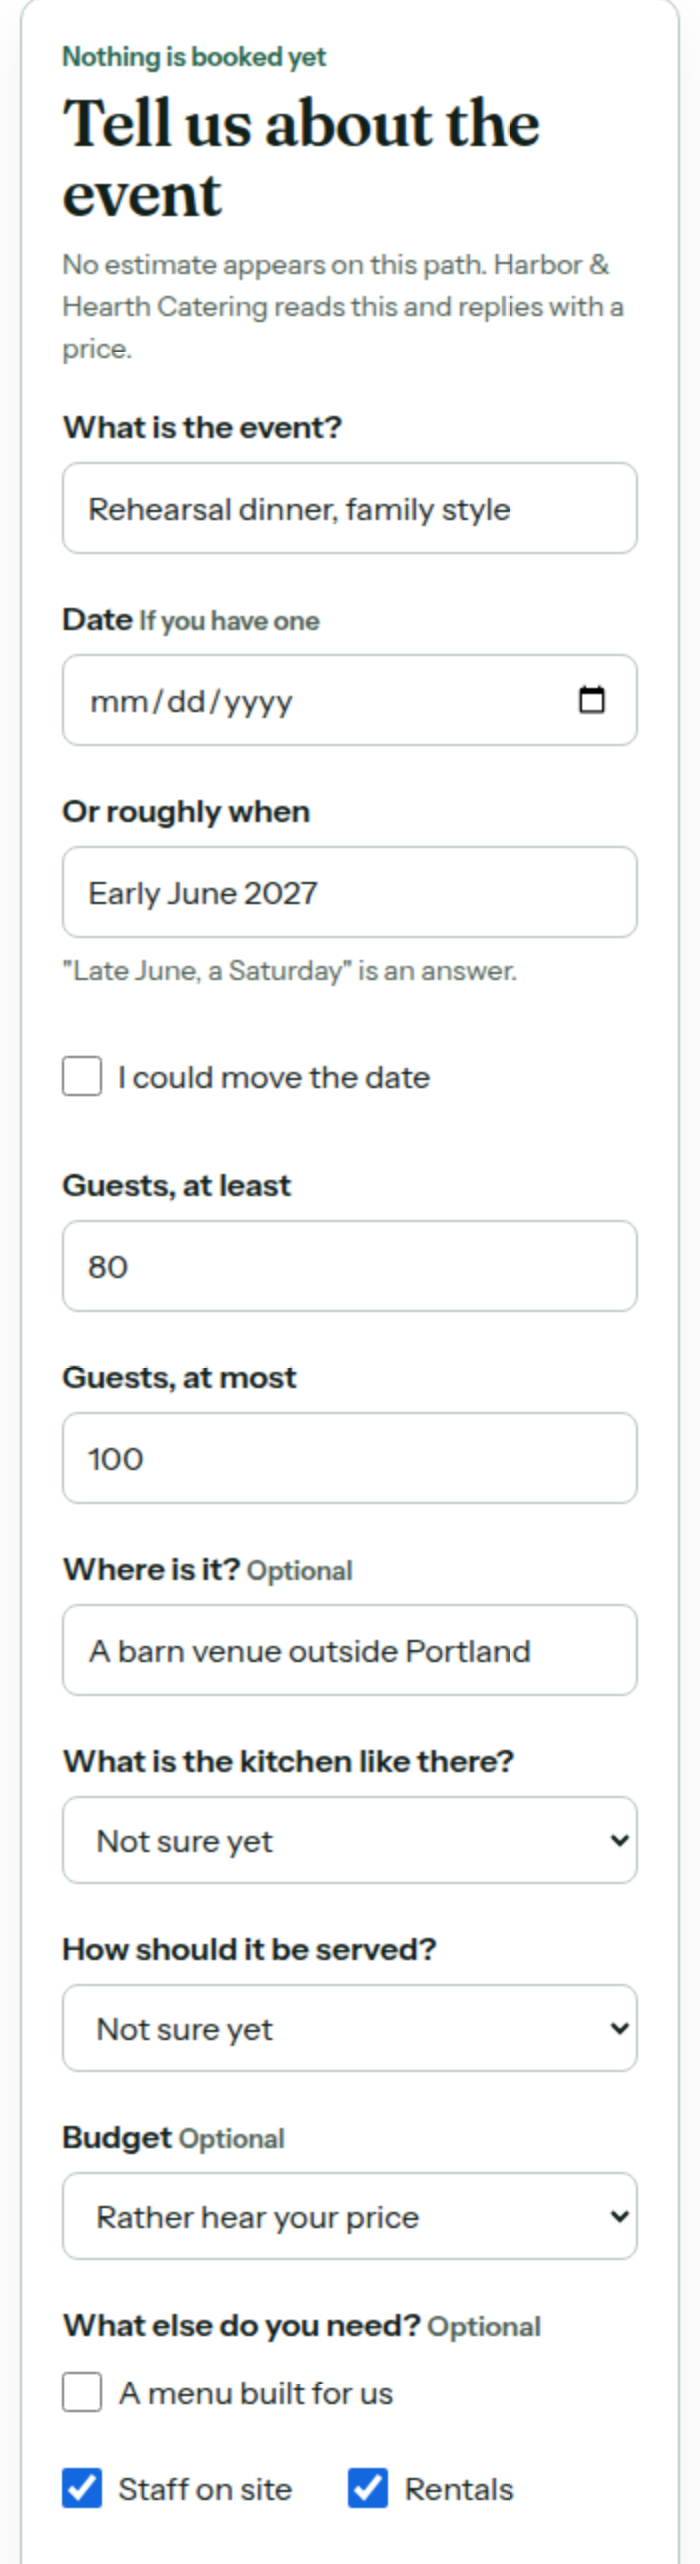
Something off the menu? Ask for a quote takes the event, the guest range and what they need. No price until you reply.


Then, in your Orders

Sample kitchen and sample client. The package photos are free-licensed stand-ins; on your site they are photos of your own food.
Next: Putting it on your website.
Put the order form on your website.
Three steps, on the last tab, Put on your website. The hard one goes to whoever looks after your site. Your link and the snippet show up there once Setup has your name.
01
Add your website
Type your site’s address under Websites that will show it and press Add website. The form only shows on sites in that list.
02
Send the snippet
Press Copy snippet, or Email it to them: your mail app opens with the snippet in it, and you add their address.
03
Check it showed up
Under the snippet the app says where it has been seen and when. If it turns up on a site you didn’t list, it says so, with a button to add that site.
Until you press Go live, the form on your site says “Not taking online orders right now.” That’s expected, not broken.
<div id="order-here"></div>
<script src="https://[your ordering address]/ordering.js" data-site-id="[your site id]" data-target="#order-here" data-ordering-origin="https://[your ordering address]"></script>
A sample with blanks: use Copy snippet in the app for the real one. The script is under 12 KB and adds its own small stylesheet and the form, in a sealed frame.
Your web person pastes two lines. You never touch the code.
Next: The settings behind it.
Four tabs, then Go live.
Settings > Integrations, then Manage storefront on the Ordering site card. It saves as you type. There’s no Save button.
Tab 1
Setup
Who’s ordering and how it gets to them.
- The name clients see, from your business profile
- Smallest and largest group
- Notice and how far ahead they can book, from Settings > Booking
- Pickup (place and address) and delivery (with a fee)
- How they pay, and an estimated tax
Tab 2
Menus
Which menus clients can order, at what price.
- Switch each menu on or off for the site
- The name and price per guest clients see
- Descriptions for the menu and each dish, or let Sage draft them
- Diet badges, which show once every ingredient in the dish is answered
Tab 3
Look
Make it look like your website.
- Your logo
- Text, button, picked-menu and background colours
- A contrast check, so the text stays readable
Tab 4
Put on your website
Your link, and the form for your own site.
- Your link, with Copy and a QR code
- Websites that will show it
- Snippet for your web person


How the client pays
- Card, through CostCook
- Connect Stripe here. When your booking rules ask for money, the client pays by card from an emailed link, into your own Stripe account.
- A partner collects it
- A payment partner takes the money and reports back when it’s paid.
- You collect it
- Your own invoice, a check, cash or ACH. The client gets an approval email, and you record the payment on the order. New sites start on this one.
Go live stays grey until
- Pickup or delivery is on. Pickup needs a place and an address.
- At least one menu is on the site.
- Every menu on the site has a price above $0.
- If clients pay by card through CostCook, Stripe is connected and can take cards.
Missing descriptions and an empty website list show up as suggestions. They don’t stop you. Take offline shows clients “Not taking online orders right now.”
Next: When a request comes in.
What they pay up front is your call.
The request lands in Orders waiting on you. Approve it or decline it. What approving does is set by your Booking rules, under Settings > Booking:
- Fixed menu: no online payment
- Approving confirms the order. A new account starts here.
- Fixed menu: pay in full
- Approving sends the client a pay link. Their payment confirms the order.
- Fixed menu: deposit, then the balance
- The pay link takes the deposit and confirms the order. The balance gets its own link before the event.
Approving requests, on the same page, can let clear ones through on their own. It’s off until you turn it on.
If you chose You collect it during Setup, approval emails the client without a pay link.
A request for something bespoke, like staff on site or rentals, takes no money. It comes to you to price, and you can move it to an inquiry.
- The pay link goes by email. A client who leaves only a phone number is sent nothing, so add their email to the order before you approve it.
- When money is due, the client has 72 hours to pay, or you have 72 hours to record what you collected. If nothing is paid or recorded, the day opens back up and the order goes back to waiting on you.
- The price never comes from the client’s screen. CostCook works out every amount after the request arrives, from what you published.
- Card payments go into your own Stripe account. CostCook won’t save cards or refund on its own.
- The form shows only on the websites you list, and it can’t read or change anything else on your page.
Put one menu on it and send yourself an order.
Turn on your lunch menu, press Go live, open your link on your phone, and order lunch for 20. You’ll see what your clients see, and what lands in Orders. Then cancel it in Orders, so it doesn’t sit there like a real job.